
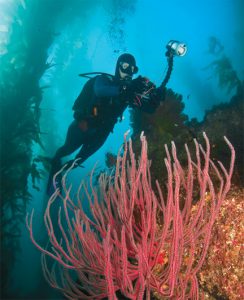
 For sport divers, scuba diving is a visual experience. We fall in love with the explosion of colors, stunning seascapes, sights of massive shipwrecks sitting on the sea floor, and opportunities to see creatures that range in size from inch-long, rainbow colored nudibranchs to whales when we enter Neptune’s realm. But as quickly as they fall in love with diving, a lot of divers find themselves wanting to do more than just look.
Underwater photography offers a perfect solution. With a relatively small investment, some effort, and the ever-important ingredient of time in the water, it’s amazingly easy to capture special underwater moments with your own camera system.
First Things First
It’s easy to write: “Underwater photography is easy as pie. Just grab a camera and fall off a boat.” But when you give a camera system to a diver it occupies their hands, and diving while holding a camera makes otherwise simple tasks such as clearing a mask, inflating and deflating a buoyancy compensator, and adjusting gear etc. more challenging.
Before you become an underwater photographer you must first be a solid diver. There are no exceptions. If you are still working to become proficient at achieving neutral buoyancy, or don’t have great discipline with regard to monitoring your depth, bottom time and remaining gas supply etc., concentrate on perfecting your diving skills before you take up underwater photography.
What You Need To Get Started
Getting started is much less expensive than many people anticipate. Modern day, entry-level cameras are relatively inexpensive. Entry-level camera systems provide a wonderful way to bring home snapshot memories, but they have their limitations. The most significant is that many camera systems in the lower price range do not come with an off-board, or external, flash (strobe), or a means of attaching one. Photographers need an artificial light source underwater to “paint” warm colors into photographs, and they will want to be able to place the light above and to the side of the lens in order to avoid ruinous backscatter in their pictures. Backscatter results when light from a flash or other light draws attention to strobe-lit particulate in the water column. The absolute worst possible placement for a light source underwater is right next to the lens (onboard).
Adding an external light will increase the cost of a basic camera system, but the difference in quality is well worth it.
As a photography instructor one of the questions I am often asked is “which camera, lenses, and strobe should I buy?” The answer is no single camera system set-up is best for all scenarios. That’s the bad news. The good news is that with many starter systems you can add accessories as your skill increases and budget allows.
One of the first accessories many photographers acquire is some kind of wide-angle lens or adapter. These tools enable photographers to get close to larger subjects, thus shooting through less water while getting the desired subject in the shot. Macro lenses are for subjects that range in size from nudibranchs to small lobsters. Many cameras come with a zoom lens that allows you to vary your field-of-view, but an additional wide-angle adapter is often extremely useful.
Of course, it is possible to spend considerably more money. Many serious shooters use high-end digital single lens reflex (dSLR) cameras or mirrorless cameras that fit into model-specific housings. The housing keeps the camera dry while also giving you access to its controls. One of these cameras, a back-up camera, full line of lenses, two lights and other accessories including a carrying case and tool kit can add up to a big investment. But there are plenty of options in between entry-level camera systems starting at a few hundred dollars and the highest of high-end systems. There is a camera for every budget and skill level.
A pitfall to avoid is buying every available lens and accessory on day one. Most instructors suggest new shooters master one type of photography or camera system before trying to master all. As a rule, they suggest new shooters begin with a camera system designed to photograph reef creatures, and work toward wide-angle photography, as it requires more expertise.
Although serious shooters generally end up using two-strobe systems, it makes sense to start with a single strobe and learn over time why you might like to add a second strobe.
Some Basics To Keep In Mind
No matter what type of underwater camera system you start with, some basic principles will always apply. The following is a list of ten things to be aware of when creating and editing underwater photographs:
- Think safety first and always.
- Water is a selective filter of wavelengths of light. The red end of the visible spectrum of light gets filtered out first. Within the visible spectrum, blue light penetrates the deepest, and this is one reason pictures taken at depth often have a strong bluish tint.
- Underwater photographers use a light, usually a strobe(s), to “add” the red end of the spectrum back into their photographs. To paint in reds with a strobe or constantly burning light, a photographer has to be within eight feet of a subject, and closer is better.
- Getting close to subjects usually produces superior results.
- Fill a pleasing percentage of your frame with your subject. If your subject is too small in the frame, odds are high that your picture will disappoint.
- When photographing any subject that has eyes, focus your lens on eye closest to the lens. And photograph subjects with their head facing the camera.
- Look for unwanted distractions along the edges of your frame when composing a photograph. Every underwater photographer either has or will take pictures that have an unwanted fin or a piece of a sea fan or kelp etc. in an image. Checking the edges of your frame when composing a picture takes practice, but it often pays big dividends.
- Consider the background when composing a photograph so you can make adjustments that help subjects stand out rather than blend into backgrounds.
- Read the directions that accompany your camera and strobe. This might sound too obvious to mention, but you’d be surprised by the number of camera owners that spend a lot of money and time pursuing photographs without knowing much about the tools they are using.
- Enjoy the process, not just the processed image. Mastering underwater photography is a lifelong challenge, and there is always room for improvement. When editing your images, look for things you did well and mistakes you made. Learn from both, and don’t beat yourself up over mistakes. Underwater photography is supposed to be fun!
Camera Etiquette
Good etiquette has its place in underwater photography. Collectively speaking, photographers catch a lot of grief for manipulating subjects to get “just the right pose,” or being unaware of their position relative to the reef, often inadvertently making contact with delicate corals. No photo is worth risking damage to the reef. All photographers are urged to remain aware of their surroundings when looking through the viewfinder.