
 Underwater photography involves a lot more than just making a dive and tripping the shutter. In last month’s issue of California Diving News I delved into the things you need to do before you dive to be sure your camera system is set up properly, and how to address the challenges of California diving. Here I’ll discuss some best practices for dealing with your images after your dives so you can find them, avoid losing them, and manipulate them so that your photographs look the way you want them to.
Playing “Finders Keepers”
As an underwater photographer, if there is anything that will drive you absolutely mad it is not being able to find a particular photograph in your image library. You have a great shot. You know it is on your computer or an external hard drive somewhere, but for the life of you, you can’t figure out where somewhere is.
Here is a far worse scenario. Imagine storing your entire library of underwater images on a single hard drive – and that hard drive fails. Perhaps, by spending a few thousand dollars in computer tech support you can have the image files saved. Perhaps, after spending the money, you’ll be told nothing could be done to retrieve those files.
These are, indeed, two nightmare scenarios that all photographers need to be aware of in the digital era. The good news is that both of these scenarios are preventable. If you do things the right way, finding and backing up images can be a snap. So, let’s get into the things you want to do to make sure you don’t learn hard lessons the hard way.
First Step: Back Up and Back Up
And back up. It makes perfect sense that the first thing we want to do after a dive is download images onto our computer and start to manipulate them with post-capture software such as Photoshop or Lightroom. But for safety’s sake it makes a much better sense to backup image files before you do anything else. A lot of professional shooters back images up onto two separate hard drives so they have three verified copies of their images before they begin to view, edit and manipulate image files, and before they reformat their media card. Some people think two back-up copies is overkill, but redundancy goes a long way toward preventing disaster.
As the pros say, there are two kinds of hard drives; those that have died, and those that are going to. The obvious takeaway message is to download and back-up your images onto another hard drive or two. Don’t just read these words. Develop the habit, and don’t break it.
Editing Starts With Deleting
While there is not a single right way to deal with your images in the post-capture phase of your workflow, editing images is a logical next step. Start by deleting all of the shots that you absolutely know will never have a useful purpose. Getting rid of the “garbage” makes the rest of your process easier and faster.
My personal method is to import my images into Lightroom, a digital asset manager (DAM) software program made by Adobe. I usually edit my images from within Lightroom, but sometimes for the sake of speed, I use a program called Photo Mechanic before importing my already twice backed-up image files.
Keywording Is Key
In the digital era the use of keywords is the key to finding images in a timely manner. Keywords are words you add to the metadata of an image file to make images easy to find. They are the words you enter in “search boxes” when using online browsers to locate information about a given topic.
The use of keywords means you won’t have to remember when or where you took every picture of every subject in your image library, and then look in folders for every trip you have made to each destination to locate the desired images. Instead you use keywords that you attach to image files to “call up” those images on your computer. That’s a beautiful thing!
The best time to add keywords is immediately after your initial edit before you start manipulating images. If you keyword before you manipulate images the keywords will be attached to every version of your images as you go forward. This means you won’t have to manually add the same keywords to different versions of the same image. Clearly, keywording images on the front end saves time and makes all versions of an image easier to find.
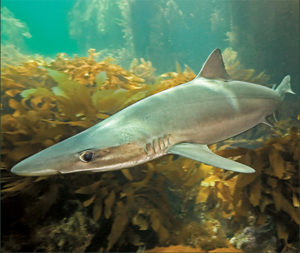
A number of software applications allow users to add keywords. You can add as few or as many keywords to a single image file as makes sense. The keywords I have attached for an image of a soupfin shark include “soupfin, tope, shark, kelp, California, Channel Islands, San Clemente Island, Pacific, North America, United States, and predator.” I can quickly find this image by conducting a search of the 250,000-plus images in my photo library with any of these keywords.
Develop A File Naming Convention
In addition to keywording it is very helpful to develop a folder and file naming system. The files produced by cameras are usually named with some sequence of letters and numbers that don’t mean anything in terms of what the picture is all about or when it was created. For example, the name of a file produced by one of my cameras is _86A2344.CR2. However, file names can be very helpful in identifying and locating an image.